Setup Guide
Complete setup instructions for the Go REST API Boilerplate (GRAB).
📋 Prerequisites
Required for Docker Setup (Recommended)
Required for Manual Setup
- Go 1.24+ (Download)
- PostgreSQL 15+ (Download)
- Git (Download)
- Make (usually pre-installed on Unix systems)
🚀 Quick Start (Recommended)
The fastest way to get started is using Docker with our automated setup:

One-Command Setup ⚡
# 1. Clone the repository
git clone https://github.com/vahiiiid/go-rest-api-boilerplate.git
cd go-rest-api-boilerplate

# 2. Run quick start (installs tools, verifies, runs migrations, starts containers)
make quick-start
🎉 Done! Your API is now running at:
- API Base URL: http://localhost:8080/api/v1
- Swagger UI: http://localhost:8080/swagger/index.html
- Health Check: http://localhost:8080/health
What Just Happened?
The quick-start command automatically:
- ✅ Checked Docker and Docker Compose installation
- ✅ Created
.envfile from template - ✅ Built Docker images with all development tools
- ✅ Started PostgreSQL and application containers
- ✅ Ran database migrations (with robust error handling and status checks)
- ✅ Generated Swagger documentation
Try It Out 🧪
# Check health
curl http://localhost:8080/health

# Register a user
curl -X POST http://localhost:8080/api/v1/auth/register \
  -H "Content-Type: application/json" \
  -d '{
    "name": "Alice Smith",
    "email": "alice@example.com",
    "password": "secret123"
  }'

# Create an admin user (interactive)
make create-admin
Create Your First Admin User 👤
After the initial setup, create an admin user for administrative tasks:
# Interactive mode (recommended for first admin)
make create-admin

# Or promote an existing user by ID
make promote-admin ID=1
Example interactive session:
$ make create-admin
Enter admin email: admin@example.com
Enter admin name: Admin User
Enter admin password: ********
Confirm password: ********

✅ Admin user created successfully:
ID: 1
Email: admin@example.com
Name: Admin User
Roles: admin, user
Admin Access
Admins can access all endpoints including GET /api/v1/users to list all users. See RBAC for complete role documentation.
Explore Your API 🔍
Interactive Swagger Documentation:
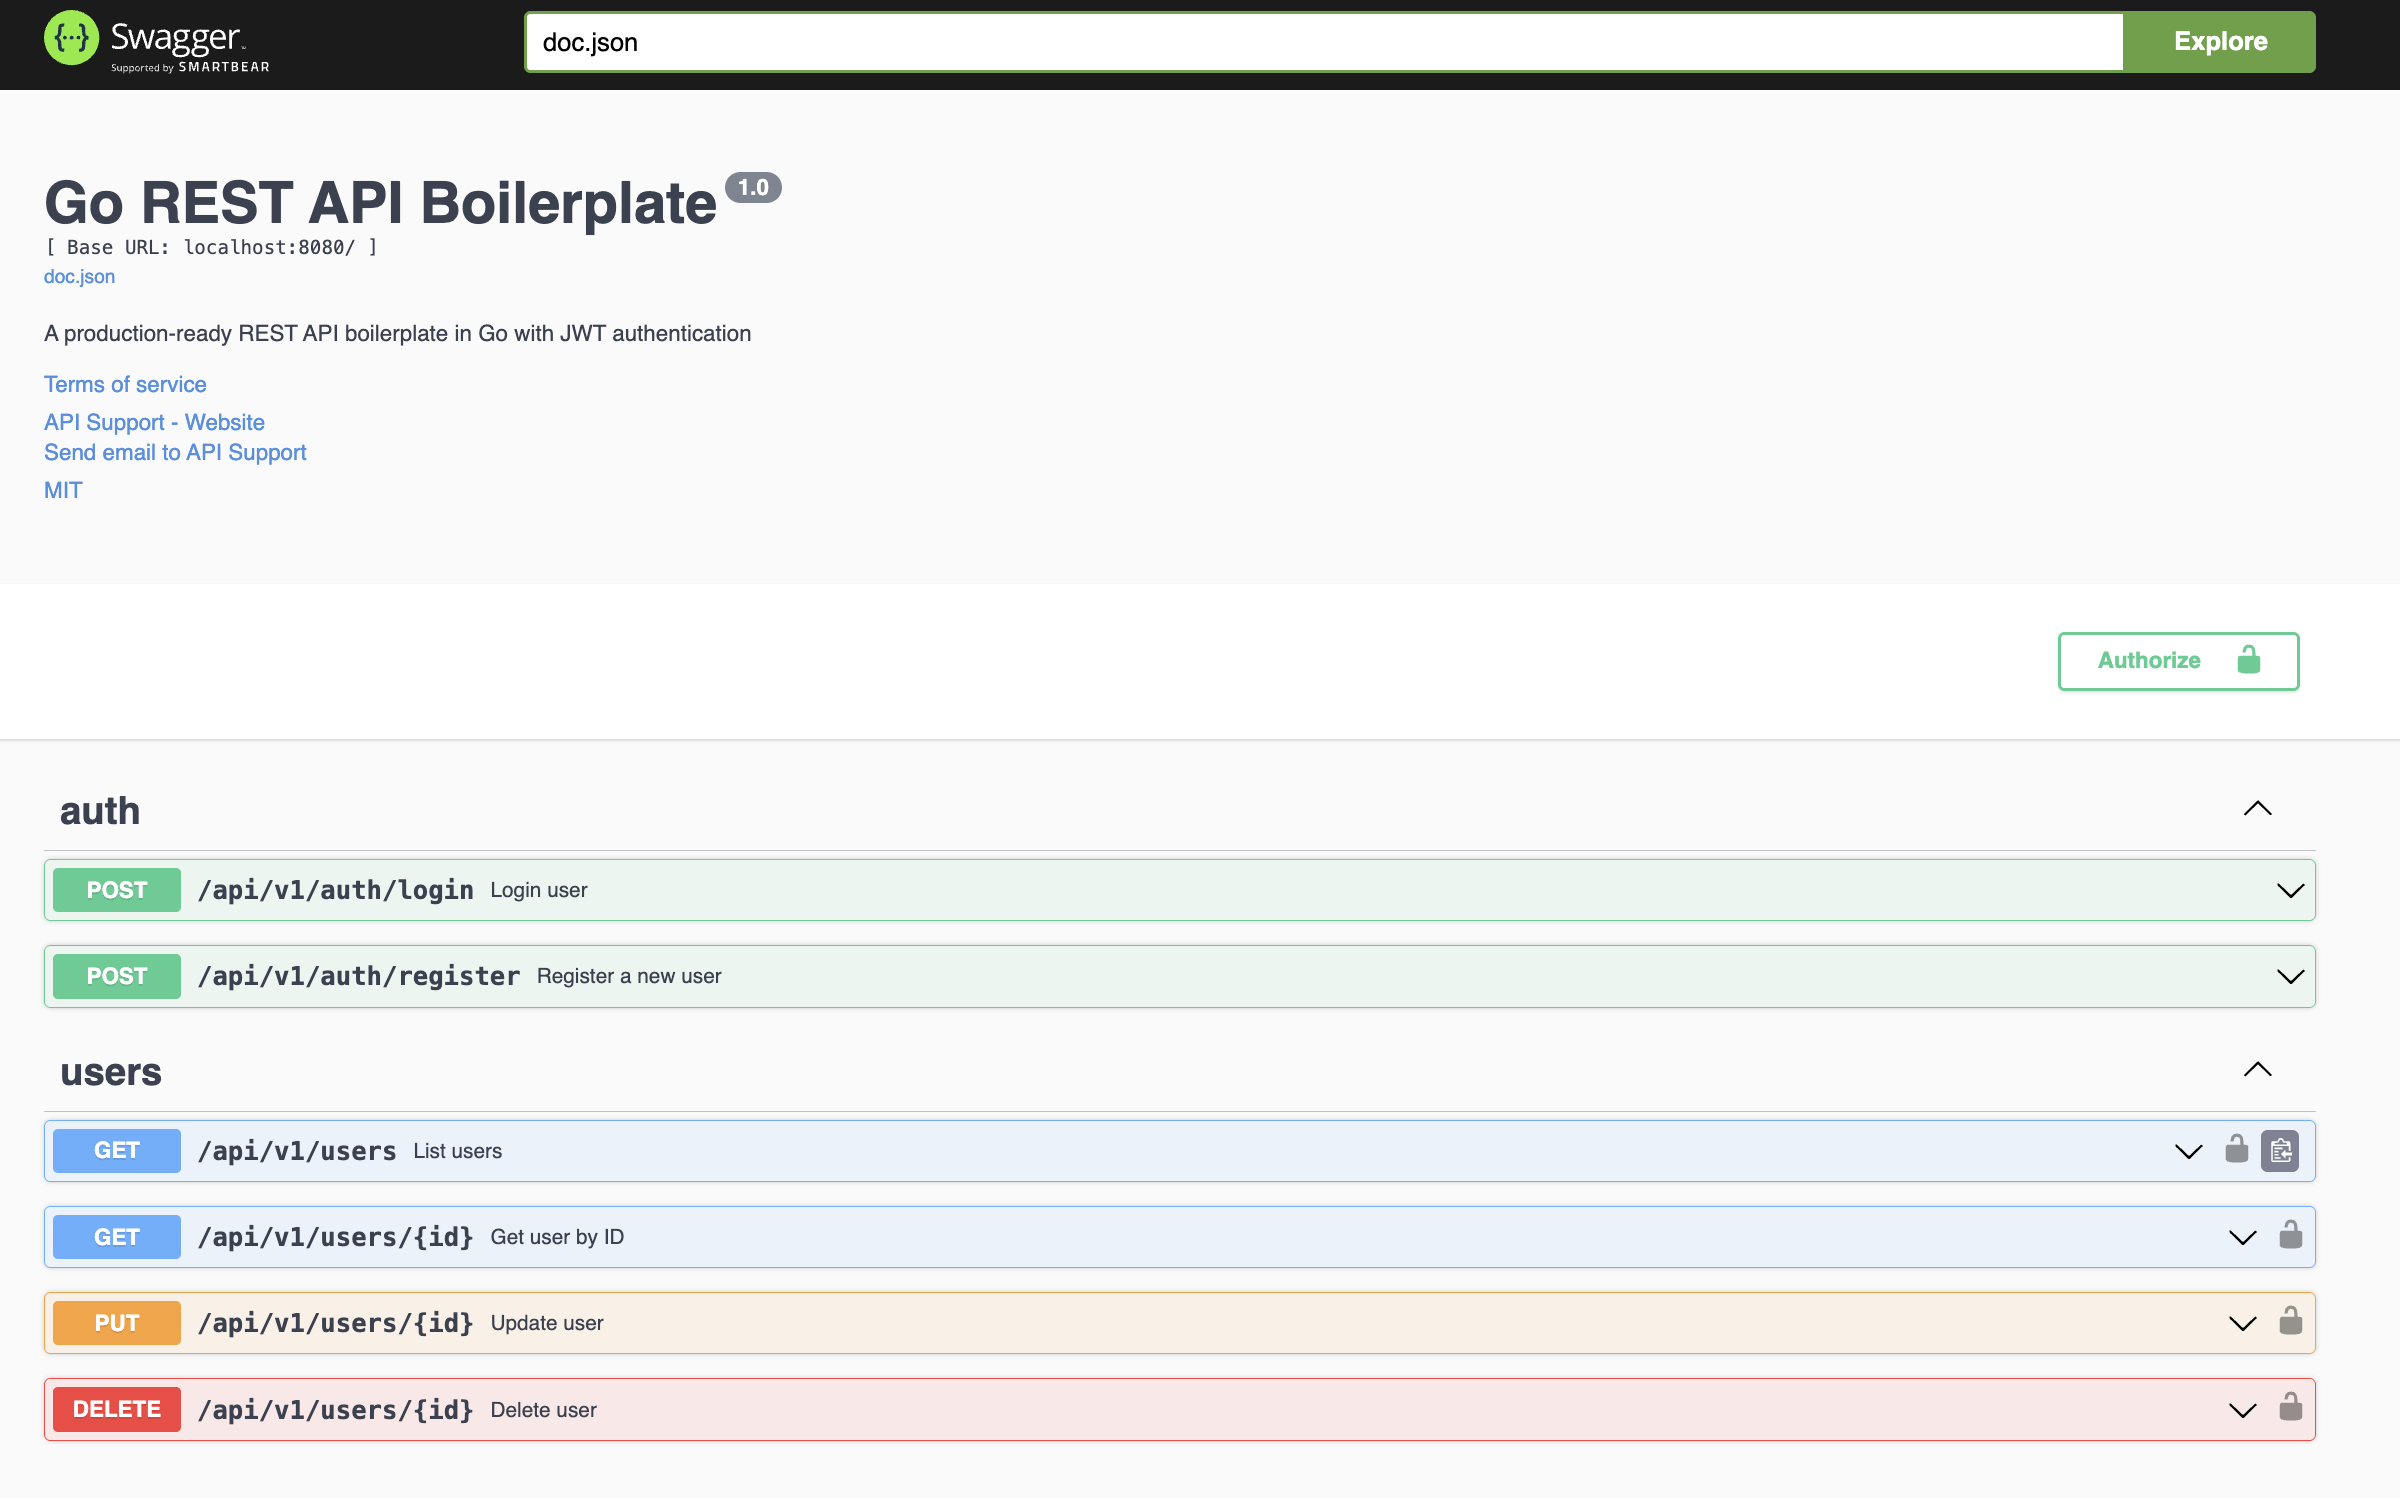
Open http://localhost:8080/swagger/index.html to explore and test all endpoints interactively.
Or Use Postman Collection:
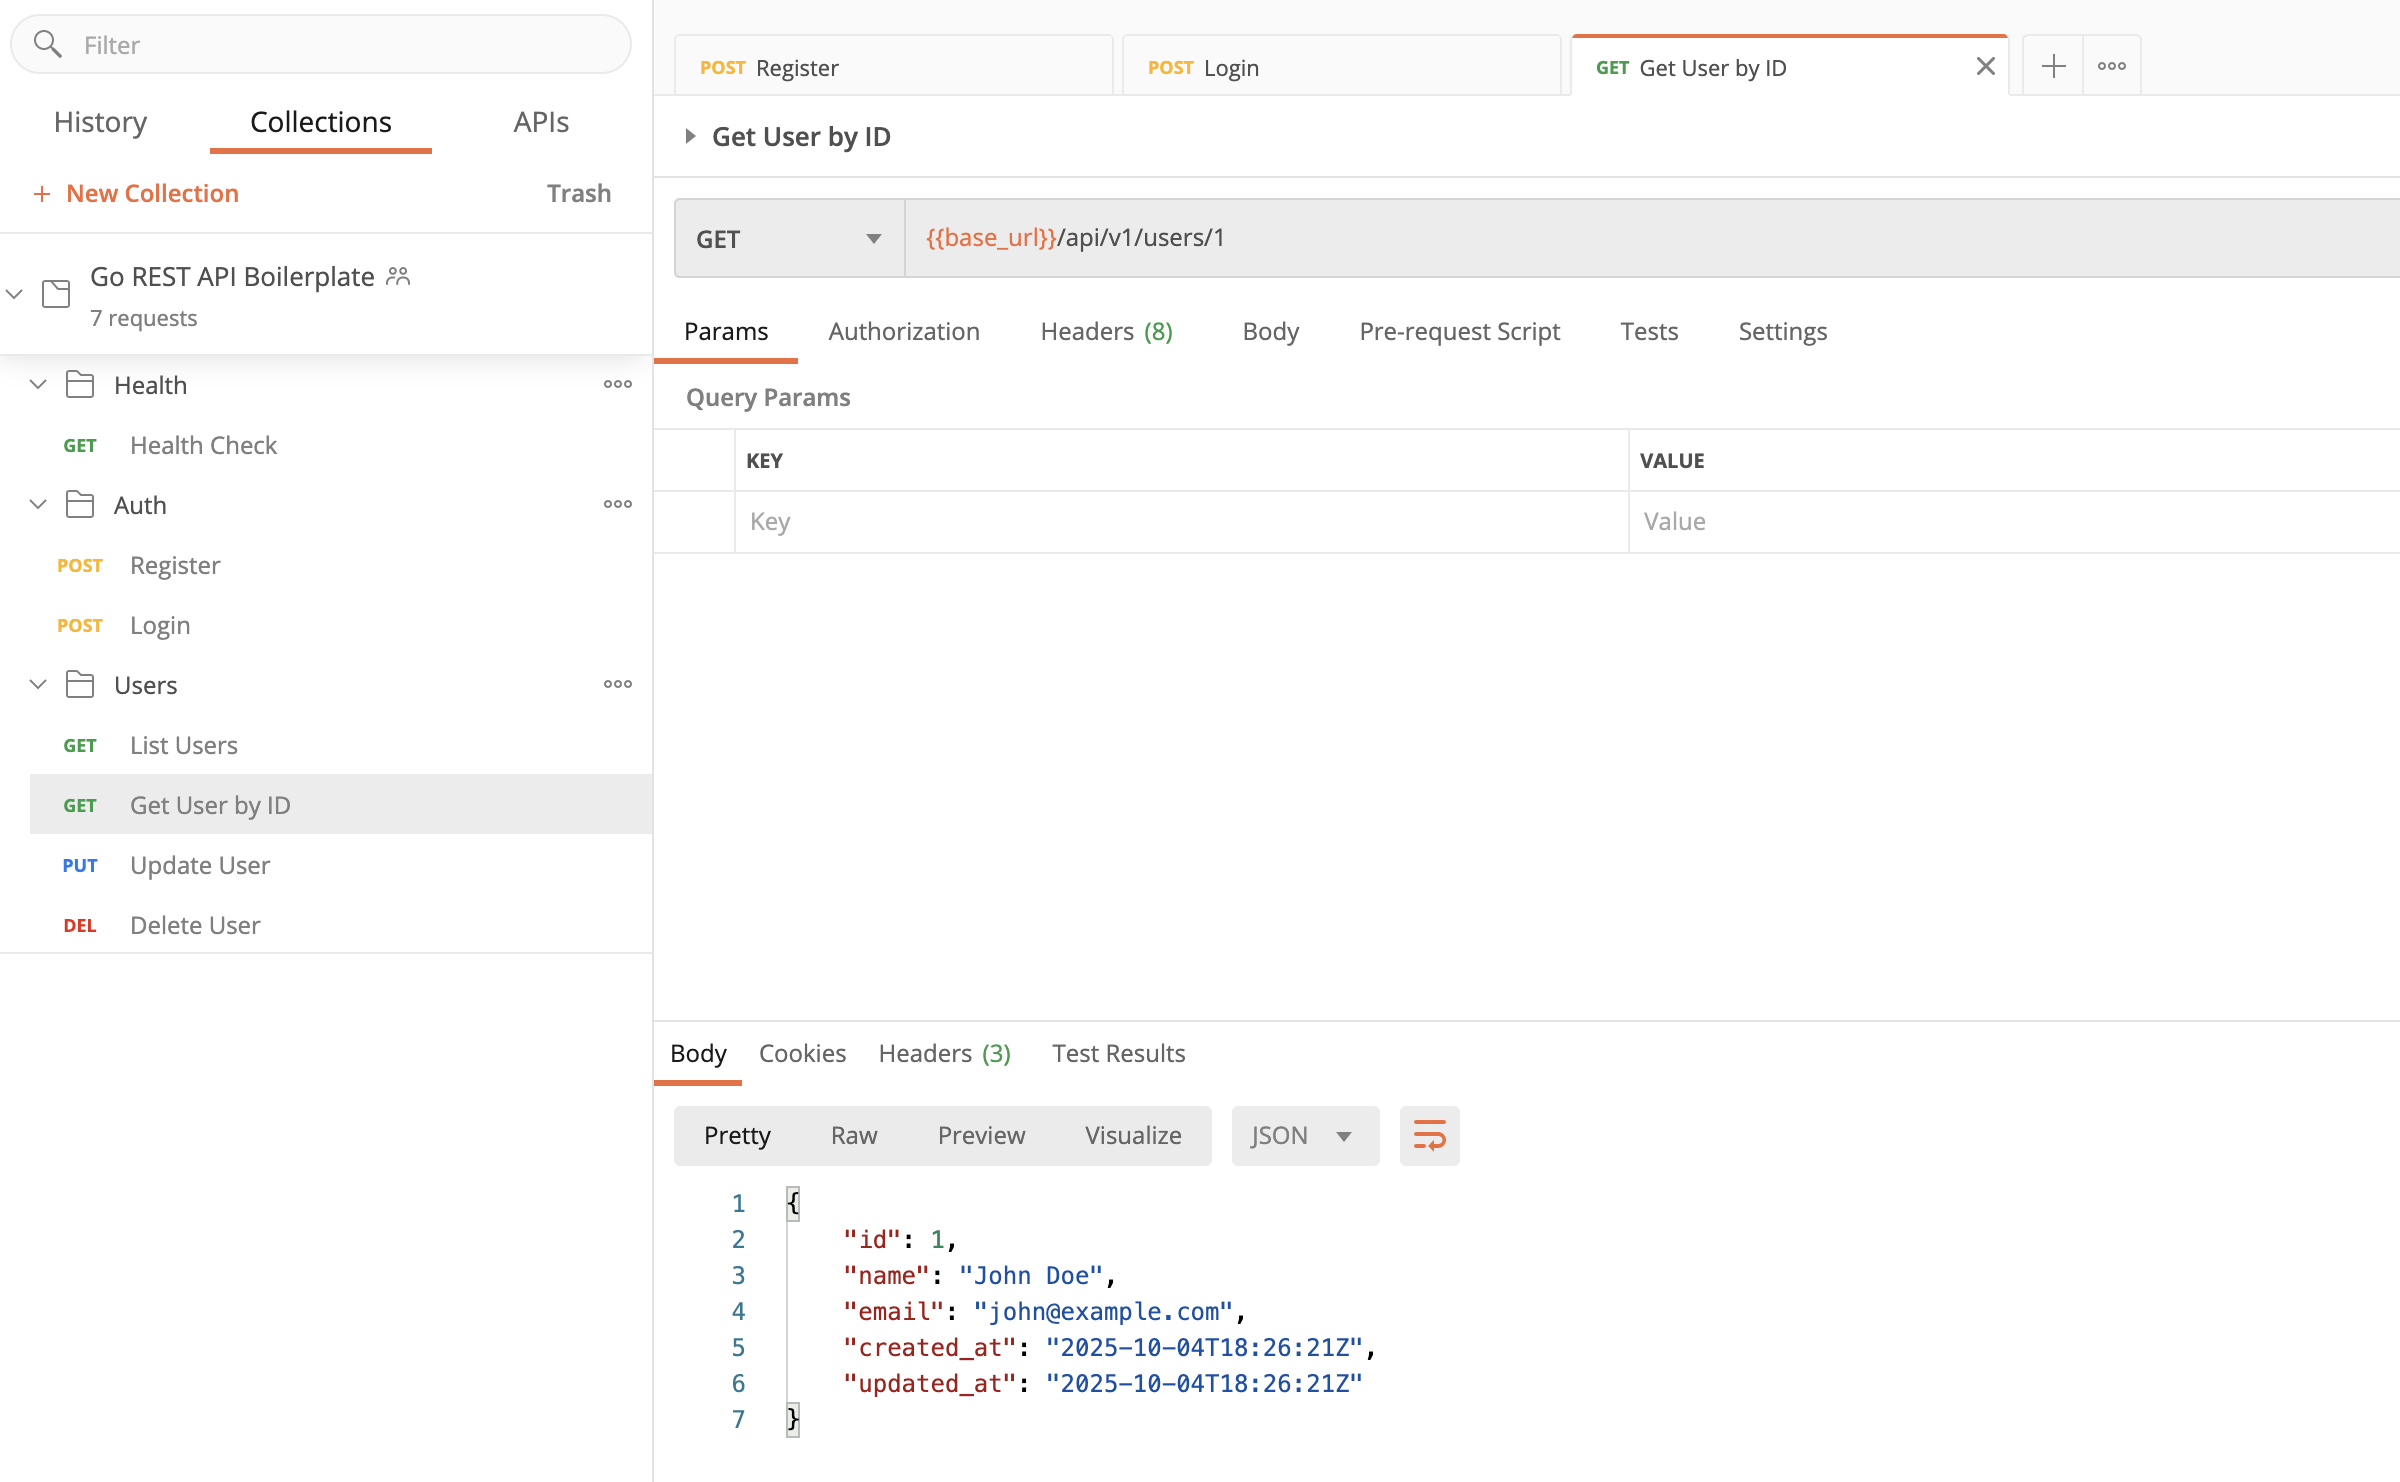
Import the pre-configured collection from api/postman_collection.json with example requests and tests.
🐳 Docker Development Setup
For ongoing development with hot-reload and live code synchronization.
Start Development Environment
Development Workflow
# Edit code in your IDE
# Changes auto-reload in ~2 seconds! ✨

# Check code quality
make lint

# Fix linting issues
make lint-fix

# Run tests
make test

# View test coverage
make test-coverage

# Generate/update Swagger docs (only needed for native development)
make swag


# Run database migrations (host)
make migrate-up

# Rollback last migration (host)
make migrate-down

# Show migration status (host)
make migrate-status
Container Details
Development Container: - Base: golang:1.24-bookworm (Debian for SQLite compatibility) - Includes: air, swag, golangci-lint, migrate - Hot-reload: Changes detected in ~2 seconds - Volume: Code synced from host to container
Database Container: - Image: postgres:15-alpine - Port: 5432 (only accessible within Docker network) - Data: Persisted in Docker volume
Accessing Containers
# Access application container
docker exec -it go_api_app bash

# Access database container
docker exec -it go_api_db psql -U postgres -d go_api_db

# View container logs
docker logs go_api_app -f
docker logs go_api_db -f
💻 Manual Development Setup
For developers who prefer to run the application directly on their host machine.
Step 1: Install Go
Ensure you have Go 1.24 or later installed:
If Go is not installed, download it from https://golang.org/dl/
Step 2: Install PostgreSQL
Install and start PostgreSQL 15+:
macOS (Homebrew):
Ubuntu/Debian:
Windows: Download from https://www.postgresql.org/download/windows/
Step 3: Create Database
# Access PostgreSQL
psql -U postgres

# Create database and user
CREATE DATABASE go_api_db;
CREATE USER go_api_user WITH PASSWORD 'your_password';
GRANT ALL PRIVILEGES ON DATABASE go_api_db TO go_api_user;
\q
Step 4: Clone Repository
Step 5: Install Development Tools
# Install Swagger generator
go install github.com/swaggo/swag/cmd/swag@latest

# Install linter
go install github.com/golangci/golangci-lint/cmd/golangci-lint@latest

# Install migration tool
go install -tags 'postgres' github.com/golang-migrate/migrate/v4/cmd/migrate@latest

# Install hot-reload tool (optional for development)
go install github.com/air-verse/air@v1.52.3
Step 6: Configure Environment
The application uses a layered configuration system with Viper that supports:
- Environment variables (highest priority)
- Environment-specific config files (e.g.,
config.development.yaml) - Base config file (
config.yaml) (lowest priority)
Generate JWT Secret
IMPORTANT: JWT secret is required and must be secure (32+ characters).
# Option 1: Auto-generate during quick-start
make quick-start  # Automatically generates if missing

# Option 2: Generate manually
make generate-jwt-secret
The generate-jwt-secret command automatically generates and saves a secure JWT secret to your .env file:
- Auto-fills .env: Checks if JWT_SECRET exists and generates if missing
- Secret length: 64 characters (base64 encoded from 48 random bytes)
- Minimum requirement: 32+ characters for all environments
- Safe operation: Won't overwrite existing secrets
Configure .env File
# Copy environment template
cp .env.example .env

# Generate JWT secret (auto-saved to .env)
make generate-jwt-secret
Update these values using the new environment variable names:
# App Configuration
APP_NAME="GRAB API"
APP_ENVIRONMENT=development
APP_DEBUG=true

# Database Configuration (updated variable names)
DATABASE_HOST=localhost
DATABASE_PORT=5432
DATABASE_USER=go_api_user
DATABASE_PASSWORD=your_password
DATABASE_NAME=go_api_db
DATABASE_SSLMODE=disable

# JWT Configuration
# Generate secure secret: make generate-jwt-secret
# REQUIRED: Minimum 32 characters (64+ for production)
# Must be cryptographically random
JWT_SECRET=
JWT_TTLHOURS=24

# Server Configuration
SERVER_PORT=8080
SERVER_READTIMEOUT=10
SERVER_WRITETIMEOUT=10

# Logging Configuration
LOGGING_LEVEL=info

# Rate Limiting Configuration
RATELIMIT_ENABLED=false
RATELIMIT_REQUESTS=100
RATELIMIT_WINDOW=1m
Note: The variable names have changed from the old format (e.g., DB_HOST → DATABASE_HOST). See the Configuration Guide for complete details on all available settings and precedence rules.
Step 7: Install Dependencies
Step 8: Generate Swagger Documentation
Note: If you're using Docker (recommended), Swagger docs are automatically generated during the Docker build process. You only need to run this step if you're running the application directly on your host machine.
# Generate Swagger docs (only needed for native/local development)
swag init -g cmd/server/main.go -o ./api/docs
Step 9: Run Database Migrations
# Run migrations (if you have migration files)
migrate -path migrations -database "postgresql://go_api_user:your_password@localhost:5432/go_api_db?sslmode=disable" up

# Or use GORM AutoMigrate (happens automatically on first run)
Step 10: Run the Application
Option 1: Using Make (with hot-reload)
Option 2: Using Go directly
# Run with go run
go run cmd/server/main.go

# Or build and run binary
go build -o bin/server cmd/server/main.go
./bin/server
Option 3: Using Air (hot-reload)
Verify Installation
# Check health endpoint
curl http://localhost:8080/health

# Open Swagger UI
open http://localhost:8080/swagger/index.html
Development Commands
# Run tests
go test ./...

# Run tests with coverage
go test -v -cover ./...

# Generate coverage report
go test -coverprofile=coverage.out ./...
go tool cover -html=coverage.out -o coverage.html

# Run linter
golangci-lint run

# Fix linting issues
golangci-lint run --fix

# Update Swagger docs (only needed for native development)
swag init -g cmd/server/main.go -o ./api/docs

# Create new migration
migrate create -ext sql -dir migrations -seq your_migration_name
🏭 Production Deployment
Option 1: Docker Production Build
Build production image:
The production image: - Base: alpine:latest (minimal size ~20MB) - Binary: Statically compiled with CGO_ENABLED=0 - No development tools included - Optimized for security and performance
Run production container:
# Run with environment variables
docker run -d \
  --name go-api \
  -p 8080:8080 \
  -e DB_HOST=your-db-host \
  -e DB_PORT=5432 \
  -e DB_USER=your-db-user \
  -e DB_PASSWORD=your-db-password \
  -e DB_NAME=your-db-name \
  -e JWT_SECRET=your-production-secret \
  go-api:latest
Using docker-compose for production:
version: '3.8'

services:
  app:
    image: go-api:latest
    ports:
      - "8080:8080"
    environment:
      - DB_HOST=db
      - DB_PORT=5432
      - DB_USER=${DB_USER}
      - DB_PASSWORD=${DB_PASSWORD}
      - DB_NAME=${DB_NAME}
      - JWT_SECRET=${JWT_SECRET}
    depends_on:
      - db
    restart: unless-stopped

  db:
    image: postgres:15-alpine
    environment:
      - POSTGRES_USER=${DB_USER}
      - POSTGRES_PASSWORD=${DB_PASSWORD}
      - POSTGRES_DB=${DB_NAME}
    volumes:
      - postgres_data:/var/lib/postgresql/data
    restart: unless-stopped

volumes:
  postgres_data:
Option 2: Native Binary Deployment
Build for production:
# Build optimized binary
CGO_ENABLED=0 GOOS=linux GOARCH=amd64 go build \
  -a -installsuffix cgo \
  -ldflags="-w -s" \
  -o bin/server \
  ./cmd/server

# Binary is now in bin/server
Deploy binary:
# 1. Copy binary to server
scp bin/server user@your-server:/opt/go-api/

# 2. Copy .env file (with production values)
scp .env user@your-server:/opt/go-api/

# 3. SSH to server and run
ssh user@your-server
cd /opt/go-api
./server
Using systemd service:
Create /etc/systemd/system/go-api.service:
[Unit]
Description=Go REST API Service
After=network.target postgresql.service

[Service]
Type=simple
User=go-api
WorkingDirectory=/opt/go-api
EnvironmentFile=/opt/go-api/.env
ExecStart=/opt/go-api/server
Restart=on-failure
RestartSec=10

[Install]
WantedBy=multi-user.target
Enable and start:
Production Checklist
Security Checklist
- Change
JWT_SECRETto a strong, random value (min 32 characters) - Use strong database passwords
- Enable HTTPS/TLS (use reverse proxy like Nginx)
- Configure proper CORS origins (not
*) - Set up rate limiting
- Enable database connection encryption
- Regular dependency updates
- Set up monitoring and logging
- Configure firewall rules
- Use environment variables (never hardcode secrets)
- Set up automated backups
- Configure log rotation
Reverse Proxy (Nginx)
Example Nginx configuration:
server {
    listen 80;
    server_name api.yourdomain.com;

    # Redirect to HTTPS
    return 301 https://$server_name$request_uri;
}

server {
    listen 443 ssl http2;
    server_name api.yourdomain.com;

    ssl_certificate /path/to/cert.pem;
    ssl_certificate_key /path/to/key.pem;

    location / {
        proxy_pass http://localhost:8080;
        proxy_set_header Host $host;
        proxy_set_header X-Real-IP $remote_addr;
        proxy_set_header X-Forwarded-For $proxy_add_x_forwarded_for;
        proxy_set_header X-Forwarded-Proto $scheme;
    }
}
🔧 Troubleshooting
Docker Issues
Containers not starting:
Port already in use:
# Check what's using port 8080
lsof -i :8080

# Kill the process or change port in docker-compose.yml
Database connection refused:
# Ensure database container is running
docker ps | grep go_api_db

# Check database logs
docker logs go_api_db
Manual Setup Issues
Go tools not found:
# Ensure GOPATH/bin is in your PATH
export PATH=$PATH:$(go env GOPATH)/bin

# Add to ~/.bashrc or ~/.zshrc for persistence
echo 'export PATH=$PATH:$(go env GOPATH)/bin' >> ~/.bashrc
Database connection failed:
# Test PostgreSQL connection
psql -h localhost -U go_api_user -d go_api_db

# Check PostgreSQL is running
# macOS:
brew services list | grep postgresql

# Linux:
sudo systemctl status postgresql
Swagger docs not found:
# Regenerate Swagger docs
swag init -g cmd/server/main.go -o ./docs/swagger

# Ensure docs/swagger directory exists
ls -la docs/swagger
📚 Next Steps
- Development Guide - Learn how to build features
- Docker Guide - Deep dive into Docker setup
- Quick Reference - Command cheat sheet
- TODO Example - Step-by-step tutorial